Showing posts with label Midwifery E-Portfolio. Show all posts

Monday, 19 July 2010

How to upload files in the new version of Tulip/MySites/SharePoint2010?

Well hopefully by now you've all seen the new set up of the Tulip/MySites this is down to uni updating its systems with SharePoint 2010 which is actually a really good upgrade for a quick overview of the updates (if your interested in such things) have a look here (or skip to find out how to upload files):


Right so how do I upload?

  1. Log into the portal like you would normally
  2. Go to the site your wanting to upload a file to (for this example I'm using a subsite of my MySite).
  3. Within said site go to a document library all Teaching and Learning sites have a "Shared Documents" folder by default so go to there. For my example I'm going to use the "Case-Loading" folder in my Eportfolio subsite. 
  4. Within your document library you should see something similar to this:


  5. As noted select the "Documents" link at the top which should change the "Ribbon" to have contextual information which will hopefully be quite self explanatory:


  6. From this select "Upload Document" and the following should pop up:

  7. It should be quite self explanatory what to do next particularity if you've ever uploaded anything on the internet before, in case your mind fails you select "browse" and find the file your aiming to upload.
  8. It'll take a couple seconds to upload (depending upon your internet connection). You will then be greeted with a quick edit panel (I'm assuming this'll get removed in the not to distant future)
    you'll need to fill out all fields marked with an *, once done select "Save" and your done.

Hope this is of some help to you, please comment or email me if you need any points explained etc.

Incase you've missed it my Video tutorial can be found here:

Tuesday, 13 July 2010

Refreshing your Midwifery E-Portfolio

Hi all, your E-Portfolio's were desinged on an older version of SharePoint which has since been upgraded (which should hopefully solve the dreaded Vista issue). However as a result of any upgrade thee are initiall teething issues. These should be ironed out automatically over time, however if your a tad impatient you can follow this tutorial:

Log into your E-Portfolio like usual and you should be greeted with this hideous looking thing (click the image to make it bigger):
As you can see from the image, select the "Site Actions" link, (its a tiny bit tedious clicking this as, you might be able to tell the sites not behaving properly).

This should bring up the following options again apologise for the viewing difficulty (click the image to make it bigger):
Try and select the "visual upgrade" option, it'll quite annoyingly disappear if you roll you mouse over certain areas etc (its although its trying it hardest to annoy you!), my best method was to click where it says "previous one").

You'll then be greeted with this page (click the image to make it bigger):

Like it says in the image ignore all the initial options and focus where it says "Visual Upgrade" select the "update the user interface" option (it'll initially be on the "use the previous user interface" option).

Then select OK, and hopefully all should be ok!

Please get back to me if there are any new issues, hopefully this upgrade that the university has done will solve some of the more known issues with your e-Portfolio... which will be nice!

Thursday, 8 October 2009

Uploading the latest version of the Midwifery E-Portfolio

Aim's/Objectives
The aim of this tutorial is to give you the latest (and greatest) E-Portfolio.

Hopefully by the time you close this window or move onto Facebook or if you're really cool Twitter, you'll have completed the following:

  • Made a back up of your old E-Portfolio.
  • Uploaded and Implemented the latest copy of your E-Portfolio.
  • Given all the correct members of staff access to your E-Portfolio.
  • Deleted your old E-Portfolio (to avoid confusion).
  • Emailed you module leads your new E-Portfolio's URL.
  • Be chuffed you have the coolest Midwifery E-Portfolio in town.*
*for a limited period only

It must be noted however that although this new E-Portfolio is the best thing since sliced bread, I still haven't managed to get around the whole "Vista" issue! It also won't magically do all your work for you, nor will it tell you what happens in the next episode of Lost of Hero's.

Backing up your Old E-Portfolio
This is strongly advised since we don't want anyone crying over spilt milk, if you've not yet got an E-Portfolio then feel free to skip this section. Please note that this section is only achievable on a Windows computer using Internet Explorer whilst on the University Campus... sorry! Before you start please prepare somewhere you want to store your backed up files, this could be on the very computer your using at this moment or on a USB drive or if your old school a CD-Rom.

  1. Open Microsoft Internet Explorer (if you don't know what this is open your web browser).
  2. Go to your current E-Portfolio, any page will do but the main page is probably the best.
  3. On the left hand menu click the first link at the top titled, "View All Site Content".
  4. Then you will be greeted with an interesting page with a sub heading titled "Document Libraries", this is the start of the back end of your E-Portfolio, think popping the bonnet on your car to expose its Engine... anyway I digress! Click the link under "Document Libraries", titled "E-Portfolio".
  5. You will then be shown a lovely list of all the files which build up your E-Portfolio, the two folders we want to make a copy of are "Documents" and "Resources" the rest can fend for themselves! The easiest way to copy these folders is to click the button titled, "Actions". This should bring up a sub-menu as shown:
  6. From this menu click "Open with Windows Explorer".
  7. This should then bring up a document folder window, much like when you look at "My Documents" on your computer or when you put in a USB Pen. From this window please select the two folders titled "Documents" and "Resources"
    • To select two separate items in a list click the first one, then press and hold "ctrl" on your keyboard and select the second item.
  8. Once you have selected the two items, copy them and paste them into your pre-prepared back up destination. Copy and paste can be done in a number of ways:
    • The easiest method is by pressing "CTRL + C" for copy and "CTRL + V" for paste.
    • Right click and select "copy" from the menu, and in your destination right click and select "paste"
    • Or once you have selected the items select "edit" from the window's menu, then copy, and in the destination's window "edit" and "paste".
  9. You should have successfuly copied and pasted your documents and resources from your E-Portfolio and they should now be stored on your local machine or USB pen. I suggest you quickly look through them all to double check.
  10. Before you move on pat yourself on your back and have a cup of tea.


Setting up the New E-Portfolio
Right let's get onto the main part of the show, the opening act has exited stage left, and the crowed is ready for the headliners to come on stage. This section can be done on any operating system and any browser...

  1. First things first you need to download the template file. Click this link, and it should ask you to download or open, please just download it to somwhere on your computer where you're going to remember its location. I recommend to your desktop. You can't actually do anything with this file just yet so don't worry if when you click to open it your computer doesn't know what to do with it.
  2. Now go to the student Portal: http://student.plymouth.ac.uk/
  3. On this page you should see on the far right hand side a box with the words "My Site" in the middle. Please click on this.
  4. You will then hopefully be taken to your "MySite" if you've not used your "MySite" before it might take some time for the system to create it. Be patient it'll magically appear before your eyes. Once loaded click on the blue box titled "Site Actions".
  5. This will bring down a sub menu as shown below, from this select "Site Settings".
  6. Site Settings is a nasty looking page with lots and lots of links, we're looking for "Site Templates", this can be found under "Galleries", pretty much slap bang in the middle. Once you've found it click through.
  7. Once "Site Template Gallery" has loaded up we want to upload the template we downloaded from from that link earlier (remember you saved it to a destination you'd remember up in step 1, once you've re-downloaded it and saved it to somewhere you'll remember this time). Click on the upload button from the top bar, as shown below:
  8. Now click on the "Browse" button and find where the Template file "Eportfolio-Sept09.stp" is located and click open. (This action is very similar to uploading a image in Facebook).
  9. Once you have clicked on "open", the Name box will be filled in, in a similar manner as shown below, the words won't match exactly since this is all based on where you saved the file to. Once you are happy with this click on ok.
  10. This will take some time to upload depending on how fast your internet is, just let it do its thing. You will then be asked to give "Title" and "Name" these should already be filled in (if not name them both "Eportfolio09", click ok.
  11. You will be brought back to where we started in the "Site Template Gallery". What have just done is give your MySite instructions on how to create your E-Portfolio, now all we need to do is tell your MySite to go ahead and create it already! To do this click on the blue box with the words "Site Actions" in.
  12. This time select "Create", as shown below.
  13. Now we're greeted with another page similar to what we saw earlier when trying to find the Site Templates however this time it's slightly different. We want "Sites and Workspaces", this is under the "Web Pages" heading.
  14. This step has some SubSteps
    • Title: Fill out Title with somethign suitable I recommend "E-Portfolio Sept 09".
    • Description: again fill out as you please, I recommend "The September 20009 update of your E-Portfolio".
    • URL name: please use "EportfolioSept09".
    • Select a Template: choose the "Custom" tab, then select "Eportfolio-090909" as shown below (yours will have fewer options than mine):
    • User Permissions: change the dot so it selects "use unique permissions".
    • The last 3 options leave as they are and click create.
  15. It'll take about 5 min for the system to create your E-Portfolio once it's done it t hing you'll hopefully be greeted with "Set up Groups for this site", as shown below. First I want you to put a semi colon (;) after your name in the last two boxes.
  16. The paste the following (minus the quote marks) into all the boxes including the last two after your name:
    • “Margaret Fisher; Alison Thoburn; Stephen Hodge; Faye Doris; Alison James; Lee Wright; Lynn Nicholls; Tina Wells; Dee Llywelyn; Rachel Redwood; Elizabeth Stenhouse; Sarah Lewis; Andrea Stebbings;”.
  17. Once you are happy with this and have something which resembles the next image press "ok"
  18. Once you have clicked ok you will then be greeted with your new E-Portfolio, this brining you to the end of the Headliner act.


Deleting your Old E-Portfolio
So next on stage is that experimental act which the headliners feel obliged to let play at their gigs but don't really want them there, and I’m sure by now your legs are hurting and you probably just want to go home. And feel free to go this isn’t essential its just a good idea so you don’t get your new shiny E-Portfolio mixed up with your old one... no-one likes drinking cold tea when a hot one's sitting right next to it!

  1. First off go to the E-Portfolio which you are wanting to delete.
    • Student Portal
    • MySite link.
    • View All Site content
    • And select your "My E-Portfolio"
  2. Now click the Site Actions button... by now you should know where it is, top right blue box...
  3. Select "Site Settings" from the sub menu.
  4. Under the 4th Column "Site Administration" select the suitably named link of "Delete this site".
  5. It'll tell you a warning I'd double check you have a back up of it as mentioned right at the start... double check your back up still works and you haven't deleted it by accident. Once your 100% sure you have it backed up click the "Delete" button.


Other Tasks...
To get to your E-Portfolio simply go to your MySite and on the left hand menu under sites you should see listed your new E-Portoflio named whatever you decided to name it.

Earlier you added a list of your Academics and myself as owners on your sites so we can check up on your work and give you any help should the need arise, however at the present we don’t know how to get to your E-Portfolio’s so could you email your Tutors the direct link to your E-Portfolio. This is quite simple:

  1. Go to your MySite
  2. Right click on the link to your new E-Portfolio and select "copy link" or "copy shortcut".
  3. Open whatever email client you use to send emails and paste that link to an email to your academics....


Right well its been a long time coming but I think we’re done! Hope you manage to get on with this one a little bit better than my previous offerings, feel free to comment or email myself if any sections are a little bit confusing or if any of the help sections in your E-Portfolio aren’t clear etc!

Thursday, 12 February 2009

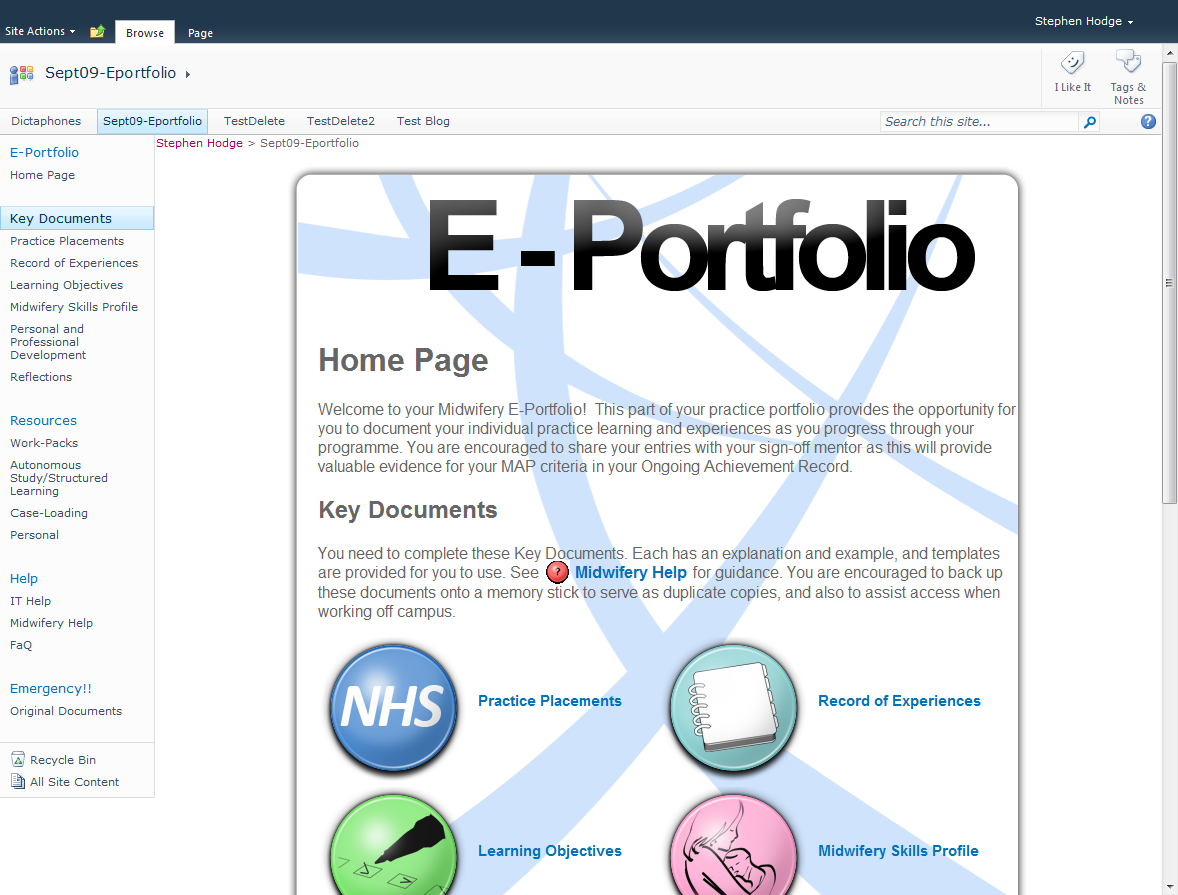
Midwifery E-Portfolio

The idea behind this project is to create an Electronic version of Midwifery students paper portfolio. To bring this practice into the 21st century and to hopefully make the process of students showing their progress a simpler task.

Just to go over some of the ground work, which people had already been done before I took up this project:

Emily – The Emily team had put a lot of ground work into this project and had done a good job of straight converting the project from paper into digital. Leaving me a good outline to copy.


SharePoint (and I mean SharePoint as we’re talking about the software not a specific area of SharePoint) – One of my main initial challenges with this project was figuring out where to start with SharePoint luckily prior to me catching this project, Margret had met with Mandy Goss (Web Services Manager), who had quickly knocked up a series of Document libraries holding each section of the E-Portfolio.


Wiki Based:


So with the knowledge of what the previous two teams had done I set out and tried my own version, this consisted of a series of preformatted Wikis, I know the Wiki tool is designed as a tool for Mass and Rapid Collaboration, however due to its friendly user interface and HTML editor etc, I felt it could have been an easy interface for students to use and add to their E-Portfolios. This method did actually succeed quite well in being an easy interface to contribute to areas of the portfolio. However it was let down majorly in a couple of areas:

  • Each form was pre formatted if students were to accidently delete this formatting the Portfolio would have been useless… to a certain extent.
  • One of the main specifications of the E-Portfolio is for students to be able to hyperlink between areas of their E-Portfolio to demonstrate learning, however at the hyperlink tool wasn’t working as desired, and the quick link feature wiki’s have built in wasn’t suitable.
  • The way these E-Portfolio were to be given to students was to save a to a site template and push this template to student’s MySites, however Wiki content wouldn’t save in a site template, so had all of the above been ok, it wouldn’t have been possible to give to all the students after all.
SharePoint - Document Based:


The way I discovered the issue of the Wiki content not being included with the site template was by going through this project with Sarah Barnes (Senior IT Training Officer). She highlighted this issue and suggested using Word documents instead of Wiki for areas which students are to edit. Which made a lot of sense as Word is probably the most used programme in the world, so it was more or less guaranteed that the majority of users would be familiar with the Word Environment and would also most probably own something which would open a word file on their home machines and if not Open Office could be used. Another benefit of using a Word document meant that hyperlinks could be easily created between documents (simple right click highlighted word select hyperlink and enter address or even browse to the file you request). After a little bit of convincing with Margret this proved to be suitable enough to use for the E-Portfolio. So the light was set Green proceed with this method.

Two of the areas of using the Document Based approach which I really liked were:

One of the huge benefits of the uni using a Microsoft Based VLE is that it integrates with other Microsoft Products very well, in the case of this project if a student was to use a university computer and select one of the word documents on their E-Portfolio they’d be able to open the document via their E-Portfolio edit and save it right back to their E-Portfolio, as though they were opening a file on their local machine. This was also an advantage in the creation of Hyperlinks as the hyperlink editor in Word would allow students to browse through the files on their E-Portfolio instead of copy and pasting a hyperlink.


You may have notice this project uses html text within standard SharePoint pages, this was initially done by using the web part tool (i.e. frames) which as we all know are far from accessible and generally frowned upon in web development circles, so after some tinkering with SharePoint designer I realised it was possible to embed a CSS sheet into a SharePoint page, which meant that I had freedom to use CSS with the Moss HTML editor. Although it sounds very sad to say so this excited me somewhat as it meant I was able to produce some simple styled pages which all rest within the standard SharePoint page, i.e. the left hand menu stays there like on every Tulip or MySite (so consistency was kept) yet the main content could be edited and styled how I desired and remained accessible.

So it would seem mission complete, I’d finished the project and met the brief… that was until I had a meeting with David Croot & Shane Sutherland….

Pebble Pad: I was aware of developments within the university of it purchasing some sort of E-Portfolio software however to me it seemed quite a long distance away, however this meeting showed that in fact the system was in place and fully functional! This meeting occurred 2 weeks before this projects Deadline...

1.5weeks later I had transferred everything from the SharePoint copy of the Midwifery E-Portfolio into PebblePad. The system actually worked surprisingly well and was very simple to use, with what started out as a friendly interface to use (however this interface became annoyingly overly friendly after much use). The Portfolio was set up by using a number of custom designed forms, the gateway and some web folios. What I really liked about using PebblePad was the fact I was doing all this within my FireFox browser, which made a change from being forced to use Microsoft to achieve full potential (obviously it would have worked fine in Internet Explorer). What this meant from an end users point of view was that, students would be able to use this version on any platform, Linux, Osx or Windows. With any browser, Safari, Firefox, Opera or even Internet Explorer.


The idea was to work on this project till the Thursday before the deadline (the following Monday), if I could get it to work perfectly then we’d go ahead and use it, otherwise we’d carry on and use the SharePoint version. Well the Thursday came and I met with Margret, we went through both methods, and both had their ups and downs, their plus points have already been mentioned where they were let down were as follows:

SharePoint:
  • Dependency upon using all Microsoft products to achieve full functionality (not ideal for Mac or Linux users), still functional using alternatives but an area of weakness.

  • Although SharePoint is a stable platform, there were some occasional bugs in the system, some of which might not have even been related to SharePoint but things like Word documents default language being set to US instead of UK or, documents not opening first time etc.
Pebble Pad:
  • I couldn’t work out a method for students to submit forms, and for it to be added to their E-Portfolios, so for things such as filling out a SWOT form they would have to go through a long winded way of adding it to their Eportfolio’s and it didn’t have much guidance.
  • One of the main things needed with this Eportfolio was the ability for students to hyperlink between sections to show evidence of their learning, however this tool during the demo kept on messing up.

From all these bad points the most prominent one was the inability to create easy links to evidence learning. So sadly for this reason Pebble Pad wasn’t used.

Implementation:

Sarah Barnes and Mark Horrocks continued their help with me on this project by helping me push it out to all students MySites, as briefly explained earlier; the desired method was to create a site template with the demo version. And push this Template out to all students ‘MySites’. This worked a treat and the majority of students happily had their own Midwifery E-Portfolios.

User issues:

I'd like to say there hasn't been any issues at all for this project since its implementation... however that would be a lie.

The E-Portfolio was designed around a student being on-site using Office 2007 and IE7 of which the system has mostly worked fine. However as it's online the majority of students prefer to access their E-Portfolio's at home, this has brought some issues, the most prominent being Vista users are unable to view and access their documents due to known security issues, which is annoying.

It seems the majority of issues are due to a combination of Students Computer Knowledge and Technology issues. Luckily the majority of which have been fixed by extensive use of the FAQ & Help Systems.

The Future:

Software designed for the Portfolio (Tulip) or Portfolio designed for the software (Pebble Pad).

Another thing to note is that obviously Hyper links didn't exist in the paper version of this Portfolio yet they are now a prominent feature in it, which brings to question will a revised version on SharePoint or Pebble Pad enable new features to simplify students learning?

Future proof

  • electronic signatures
  • mixture of prescriptive & flexible data
  • security