Before we start, this tutorial as with most of my tutorials about SharePoint all presume you have Ownership rights over your Module/Programme...
1. Go to the Module/Programme site in question, and select the discussion board your wanting to let your students use:
1. Go to the Module/Programme site in question, and select the discussion board your wanting to let your students use:

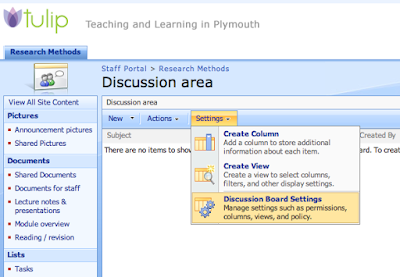
2. Once in the correct Discussion area press the "Setting" button, this brings up a sub menu (as pictured), from this menu select "Discussion Board Settings".
3. You are then greeted by a scary looking page full of settings, don't worry take some time in reading each section if you want there are some useful settings you might want to come back to at a later date to change. However for this example we just want to change the permissions so select the link called "Permissions for this discussion board". (as shown below).

4. Tulip then shows you all the different permissions associated with that particular discussion board (I bet you wern't aware there was so many). There's not much else you can do on this page apart from select "Actions" from the Menu and then "Edit Permissions". Tulip will then warn you that you are going to change the permissions of this section and not the whole site.. or something along those lines, don't worry about what it says just click ok and move onto the next step!
 If you or a colleague has already changed the permissions on your module site then this whole step will need not apply (it'll be obvious if so since this step wont make sense! Just skip this step and move onto step 5.
5. You will then be greeted with the same list only this time each user group has a little tick box to the left of it. We are wanting to change the Students group so tick the little box next to them (as shown below). Once you have ticked the right box select "Actions" from the top menu and "Edit User Permissions"

6. This brings up a list of all the permission levels you can possibly give a user, we could give the students "Full Control" but this might have repercussions as they'd be able to delete fellow students replies or edit them etc, luckily the nice chaps in Babbage (I think) have created a specific permissions group for discussion boards titled "Discussion Board User", tick the little tick box and press ok. (As shown in the image below)
 7. And your done, if done correctly you should see your students group with "Read, Discussion Board User" next to it, as shown below.
Well that wasn't quite 10 steps... but I guess in this case less is better! Enjoy!
No comments:
Post a Comment