Monday, 16 August 2010

KTP - Short Programme - Helping Children at Risk

Work for this project finished a month or so ago, however I've only just got around to sorting out the video. This project (excuse my ignorance I'm a Technologist not a Social Worker) was essentially aimed to use technology to break down the personality barriers social workers have when discussing in groups about cases. 

The project consisted of 4 groups of pairs in a room, however no-one knew who they were paired with, simple text chat protocol was used to hopefully level out the playing field of group dynamics, i.e. a quiet and a loud social worker discussing points will result in the louder social worker's opinion being projected to a greater extent than the opinion of the quieter social worker so by using a computer to shield these aspects and hopefully not be a barrier in itself the test social workers discussed a number of scenarios and how they'd rank them in importance etc... and the other crazy things social workers get up to! 

They were then instructed to write their own reports using the discussed information, this was achieved by using some on-line forms I created which mirrored the forms they would use in real life (yeah simulation to the max!) a screen grab of these said forms:


Then the next bit which I think is quite special is each submitted report, is then passed onto the next group, so a group was able to view another groups report and then re-assess the report. Again due to the fact no-one knew who they were speaking to within the room meant the information could be peer assessed/criticised without the usual worry about standing on people's toes or feeling like they're being a suck up etc... then these re-assesset reports can be edited and resubmitted. 

All data form the reports to the chats was logged via a MySQL database which allowed for flexible analysis pre experiment. All coding was done from scratch with a fair amount of inspiration from this:


Monday, 19 July 2010

How to upload files in the new version of Tulip/MySites/SharePoint2010?

Well hopefully by now you've all seen the new set up of the Tulip/MySites this is down to uni updating its systems with SharePoint 2010 which is actually a really good upgrade for a quick overview of the updates (if your interested in such things) have a look here (or skip to find out how to upload files):


Right so how do I upload?

  1. Log into the portal like you would normally
  2. Go to the site your wanting to upload a file to (for this example I'm using a subsite of my MySite).
  3. Within said site go to a document library all Teaching and Learning sites have a "Shared Documents" folder by default so go to there. For my example I'm going to use the "Case-Loading" folder in my Eportfolio subsite. 
  4. Within your document library you should see something similar to this:


  5. As noted select the "Documents" link at the top which should change the "Ribbon" to have contextual information which will hopefully be quite self explanatory:


  6. From this select "Upload Document" and the following should pop up:

  7. It should be quite self explanatory what to do next particularity if you've ever uploaded anything on the internet before, in case your mind fails you select "browse" and find the file your aiming to upload.
  8. It'll take a couple seconds to upload (depending upon your internet connection). You will then be greeted with a quick edit panel (I'm assuming this'll get removed in the not to distant future)
    you'll need to fill out all fields marked with an *, once done select "Save" and your done.

Hope this is of some help to you, please comment or email me if you need any points explained etc.

Incase you've missed it my Video tutorial can be found here:

Tuesday, 13 July 2010

Refreshing your Midwifery E-Portfolio

Hi all, your E-Portfolio's were desinged on an older version of SharePoint which has since been upgraded (which should hopefully solve the dreaded Vista issue). However as a result of any upgrade thee are initiall teething issues. These should be ironed out automatically over time, however if your a tad impatient you can follow this tutorial:

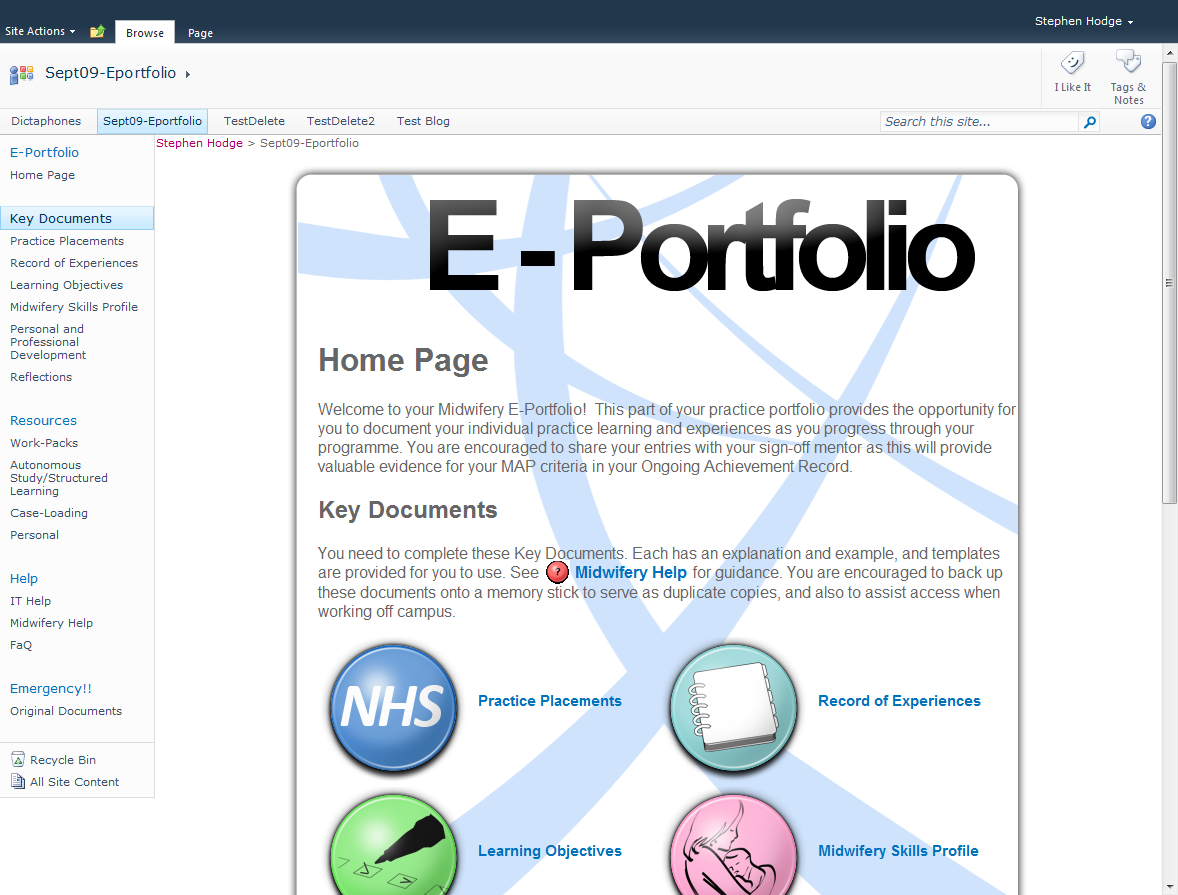
Log into your E-Portfolio like usual and you should be greeted with this hideous looking thing (click the image to make it bigger):
As you can see from the image, select the "Site Actions" link, (its a tiny bit tedious clicking this as, you might be able to tell the sites not behaving properly).

This should bring up the following options again apologise for the viewing difficulty (click the image to make it bigger):
Try and select the "visual upgrade" option, it'll quite annoyingly disappear if you roll you mouse over certain areas etc (its although its trying it hardest to annoy you!), my best method was to click where it says "previous one").

You'll then be greeted with this page (click the image to make it bigger):

Like it says in the image ignore all the initial options and focus where it says "Visual Upgrade" select the "update the user interface" option (it'll initially be on the "use the previous user interface" option).

Then select OK, and hopefully all should be ok!

Please get back to me if there are any new issues, hopefully this upgrade that the university has done will solve some of the more known issues with your e-Portfolio... which will be nice!

Tuesday, 8 June 2010

Work And Wellbeing MSc/PgDip/PgCert

I've been asked to give examples and tutorials on how, web technologies can be used to help enhance our new programme: Work And Wellbeing MSc/PgDip/PgCert

More Specifically:

  • Customised Share Point/Tulip Pages
  • Blogs
  • Podcasting/iTunes U


First off some background about Work And Wellbeing for those not in the know.

"This pioneering programme has been developed for those individuals/organisations who maintain people in or return people to work. This is a contemporary programme that takes a biopsychosocial approach to addressing lifestyle balance, health and well-being in the workplace."

Custom: 
Customised SharePoint sites can come in a wide range of forms, simple ones which require little technical know how to utilise such as custom links:


Every SharePoint/Tulip page has a links section filled with default links, however it can be really useful for students to place contextual links here such as government initiatives relevant to the course/module or blogs from people with areas of expertise in that area etc. For example if this was an E-Learning Module linking to Steve Wheelers Blog would be a useful for the students.

To create/update the links list users simply have to click on the "Add new link" option (this option isn't viewable for students FYI).

Adding links is all very well and good, but what if you want to create a site people link to not from? Well SharePoint/Tulip being the flexible resource it is can be folded in any manner you want, it just needs a little bit of persistence and perhaps some help from your local Learning Technologist... this is something I've created recently along with Adele Kane:


Now obviously this might be out of the scope of this course, but hopefully you'll be able to see some aspects which could be used, this particular site has been published publicly so, anyone in the world can view it without having to log in, likewise you could create something of academic excellence (or something like that) and show it off to the world.

Blogs
Blogs seem to be big business within this faculty all I seem to blog about on this blog is about how to blog! So I won't go into any blog examples or how to blog specifically in this blog post. However with a course like Work and Wellbeing with students from a wide range of backgrounds I can imagine blogs could be a key aspect of the some of the modules.

Blogs essentially give your students a voice, which can be shared amongst the class, I imagine this could be useful particularly with students coming from a variety of professional backgrounds, they might be able to give contextual reflections about what they've learned and as a result help their peers and future potential students etc.

Podcasts/iTunes U
The most misused term in E-Learning and here all I really mean is audio recoding's or video/PowerPoint slides with Audio over the top. Basically all I'm referring to is an audio recording or a video which will be of benefit to the students learning. These can be simple uploaded audio recordings taken directly from lectures, or slightly more complex could have slides overlaid onto the audio recordings. Or most effectively short audio/video/slideshow snippets highlighting key aspects of programmes/modules/lectures for students to review at later stages (e.g. before exams), whilst on the way to their next lecture to refresh their memories etc. I hope you can see how amazingly powerful these could potentially be, however annoyingly due to the effort put in is quite often skimped over in favour of more traditional techniques. However there is nothing stopping you from getting your students to do all the hard work for you and to create such resources themselves to benifit the rest of the class etc?

Above I've mentioned iTunes U, iTunes U is a key initiative the TEL (Technology Enhance Learning) team at the university are aiming to push. iTunes U is a tool created by the guys at Apple (think iPods, iPhones, Macs etc).

"iTunes U — a powerful distribution system for everything from lectures to language lessons, films to labs, audiobooks to tours — is an innovative way to get educational content into the hands of students." 
http://www.apple.com/education/itunes-u


The difference between this and podcasts on Tulip, is that these podcasts are free for the whole world, i.e. do you really want to be shoving all your lectures on there free for anyone in the world to view. In an ideal world this would be fine as all your really paying for with a degree is a piece of paper with University of Plymouth Logo on, but obviously there's more to it than that! The way's I'd see people using iTunes U, is to create these high quality snippets of each lecture/module/programme for anyone in the world to view. This comes into its own when the areas your covering are pioneering in their field, such as this course. Since why would people want to view your particular resource when they could be looking at a university better suited in that area. For example it wouldn't be worth listening to a technology lecture from an unheard of university when you could be listening to the pioneering technology guys over in MIT.

Thursday, 22 April 2010

Blogging with Pebble Pad

Yet another blog post about how to blog! This tutorial is to show you how to blog using Pebble Pad. I shall try to keep this post as generic as possible however the reason for this tutorial has come about due to people having difficulties with the SCW538 module non generic information shall be coloured in red.

Hopefully once you’ve finished reading this post you will be able to do the following:
  • Know what a blog is
  • Find your blog
  • Post to your blog
  • Add Photos to your blog
  • Editing/Deleting your posts
  • Add/Remove Comments
Blogs seem to be one of the key words in circulation today, firmed from the web 2.0 explosion of the start of the 21st century, used as a medium for individuals to voice their opinions/experiences/knowledge etc online. I could give my understanding of a blog but feel this little video might be clearer:


If your on the SCW538 module or otherwise we’re going to show you how to use Pebble Pad’s blogging technology. The reason this is the case as opposed to you creating your own blog through BlogSpot or Wordpress is mostly due to security and confidentiality issues, your blog has been set up so only yourself and fellow course mates are able to view your blog posts, although this does have a certain level of damage prevention should you accidentally expose a patients confidentiality all attempts to prevent a slip up should be adhered to. 


Getting to your blog
As discussed your blog is situated on Pebble Pad to logo into Pebble Pad go to the following address:
At the login screen enter your standard university username and password, the same one you use to access your Emails, Tulip or Emily. Once logged in feel free to have a little play around with all the features that pebble pad has after all, all we're using it for in this example is blogging but PebblePad is much much more than just a blog tool! If you wanna just get to your pre-set up blog then just click through to your assets store as shown below:


Once in your assets store you might find a large number of documents or none at all it all obviously depends upon how much you have used your pebble pad account! Along the top of the list of your assets you should see a tab called "received". Click this tab:


Once within the "received" tab scroll till you see your name listed there. Once found click on it:


This will open up a new box/window thing on the right click the option with the magnify glass "view and post to blog". Likewise you can view your fellow students blogs doing the same method, however you don't have permission to post to them.

Now we are in your actual blog
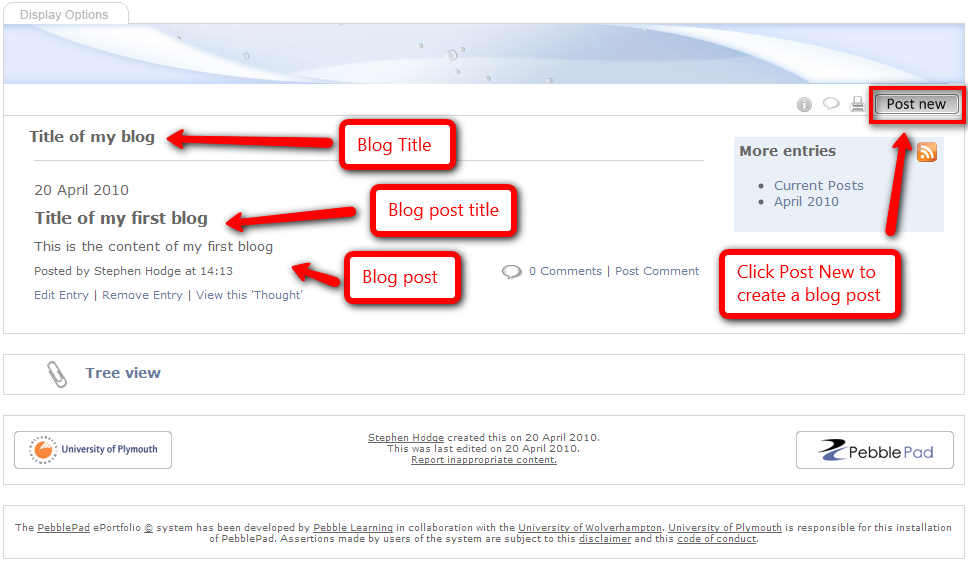
You should hopefully see something along the lines of this:


Don't worry if you have no posts listed, this will probably be because you haven't created any yet!

Post to your blog
From the page above you might be able to see the button which says "Post New", this is quite self explanatory so go ahead and click it already! Once clicked a pop up window like below will appear:


This is your blog post tool, as you can see it's far from complicated! So just go ahead and type your thoughts and experiences etc! Once happy press submit and your blog post will be posted!

Adding a Photo to your Post
As the saying goes 'a picture is worth a thousand words', you might want to save some time and just show a photo of what your trying to explain.  Try to maintain confidentiality (unless prior consent has been given) and avoid copyright infringements etc, further information on copyright can be found here:

Anyway, adding photos is as easy as pie with PebblePad, see the above image where it says "File" and then "Choose File" button, press this said button. This will bring up the browse to file window, select your image and press open: (the image below is dependant upon your operating system however you will be greeted with something of a similar nature)


Once you have done this submit your blog post and the image should automatically upload at the same time. Hopefully that's all you need to know about authoring your own blog posts.

Editing/Deleting posts

If we go back to your PebblePad home page, you should notice that after creating some blog posts you'll notice some newly created assets in your store. Visit your said assets store:


As explained in the image, any asset with a thought cloud icon is a blog post, it's title will match your blog posts title (obviously). If you wish to edit or delete the post, simply select the said thought, click edit this asset to edit it, or click more options, this brings up a pop up box from this select "remove".

Commenting
Part of the nice thing about blogs is that you can get a nice community going and due to the usually faceless nature of blogs means its less intimidating to comment on people's views than it would be than say in a classroom type environment. To comment on your own of other people's blogs go the assets store and like earlier select the "received" tab, from here you can see your own blog and hopefully your fellow students blogs, select any blog you want to comment on. Click the same button you used earlier "View and post to blog".

At the bottom of each blog post you should see a little speech bubble icon, followed by how many comments there are listed:
Click the "Post Comment" link to go directly to posting a link or click the number of Comments link to view other people's comments.

If someone has posted something on your blogpost and you feel its impact is of a destructive nature then you can remove the comment, to do this go to the said blog post, at the bottom of which it should list comments, click through this link, then it should display comments along with a "Remove" link, likewise if its a comment you've posted you can remove and edit it:


Hopefully that's all you need to know about blogging with Pebble Pad, please feel free to email myself or comment on this post if there's anything incorrect or missing or if you just want to say hello!

Tuesday, 30 March 2010

Mentorship Resource - Almost complete

Hello all I'm sure you'll all share my excitement that the Mentorship resource has finally been completed... well I'm waiting for some feedback before its all officially live... which is where I'm hoping you guys will come in useful!

So please have a look through it, anything which looks a bit hmmm I'm not sure if that's working right or any spelling mistakes... ANYTHING please comment this post or drop me an email!

http://public.tulip.plymouth.ac.uk/Module/HEAB370%20AYAU%2009/Mentorship2010/default.aspx

Some things I'm soon to change are the quiz is in need of yet more work (the timing between solutions being displayed and taken away), but this time it should hopefully be quite simple to rectify. Other fun things are to check every link is working. Hopefully you guy's will be able to point out if any links are dead etc?!

That's all for now!

Tuesday, 2 March 2010

Oh yeah Mentorship Updates!

Well I figured I would have done more updates about this over the time, but sadly most of my time has been pre-occupied making this work! Well to plan has been to update the previous version I created of this mentorship resource which was originally designed for CD, this new version is to be housed on Tulip.

Original resource - UOP login required.

And my current work in progress - UOP login required.

One of the exciting things about this project is that this project is to be aired to the whole world using Tulips newest feature of external access. So I'll be able to show my finished product on this very blog! I can tell your as excited as me!